Sola-Site-Logo
Search

Home » Blog » How to Attach a Pergola to Your House: Complete DIY Guide

How to Attach a Pergola to Your House: Complete DIY Guide

How to Attach a Pergola to Your House Complete DIY Guide

Yes, you can absolutely attach a pergola to your house—and it’s one of the most popular ways to expand your shaded outdoor space. However, the difference between a structure that lasts 20 years and one that damages your walls comes down to two critical factors: anchoring into structural framing and applying waterproof flashing correctly.

However, many DIY guides simplify this process by telling you to "just bolt the ledger to studs." In reality, finding the exact framing, identifying your wall material, and sealing ledger boards correctly are where most projects fail.

In short, attaching a pergola requires mounting a horizontal ledger board to your home's framing, securing the back beam, and properly flashing the wall connection. This complete guide walks you through the exact tools, step-by-step installation, and the critical mistakes that turn a $5,000 project into a $5,000 wall repair.
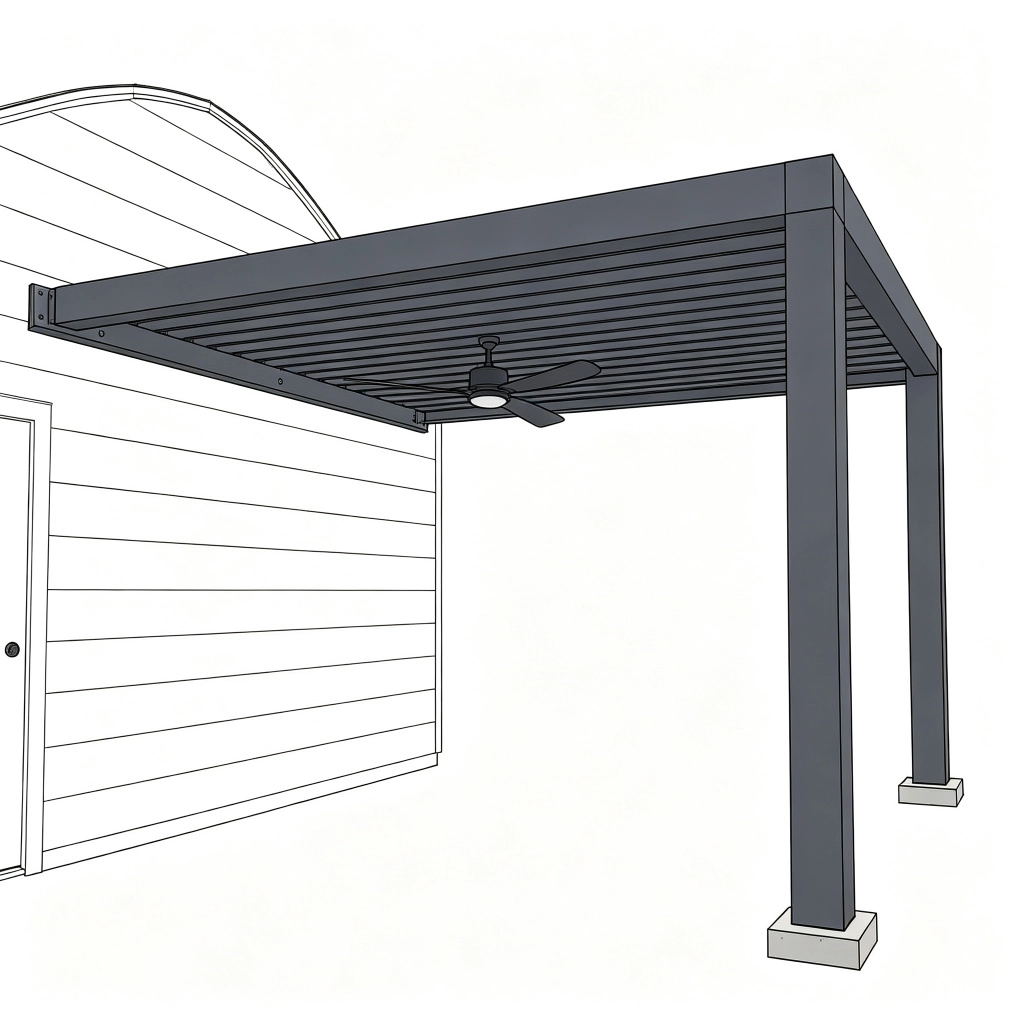
Can You Actually Attach a Pergola to Your House?

Short answer: yes, provided there is a solid structure behind your wall.

Whether it can be installed depends on:

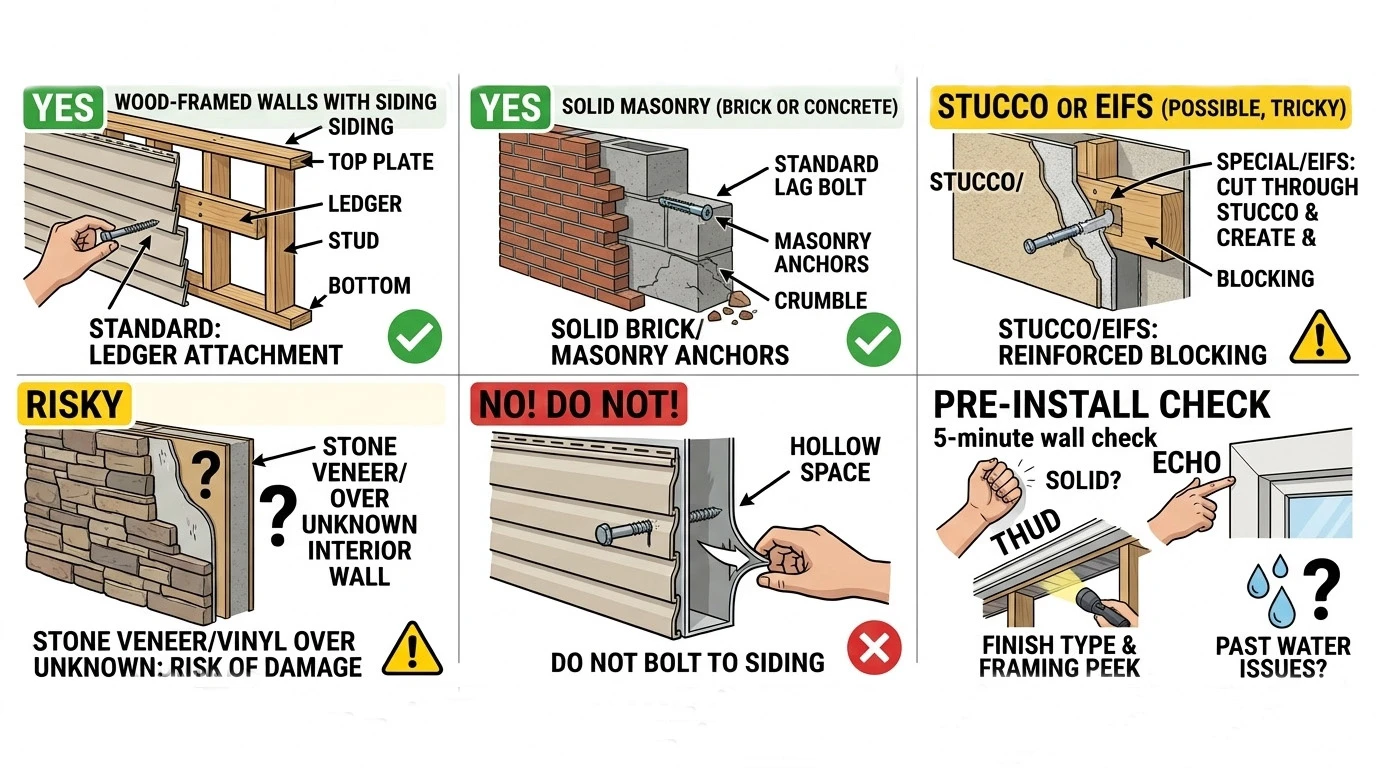
  • Wood-framed walls with siding — Yes. This is the standard scenario. Find the studs, bolt the ledger in, add flashing.
  • Solid brick or concrete block — Yes, but with masonry anchors. You can't use standard lag bolts in brick — they'll crumble.
  • Stucco or EIFS — Possible, but tricky. You have to cut through the cosmetic layer to reach framing behind.
  • Stone veneer or vinyl over unknown structure — Risky. You can't tell what's behind it without cutting in.

What you cannot do: bolt directly to vinyl siding, stucco, or stone veneer. Those materials have zero structural capacity. The bolts must go into wood studs, solid masonry, or a reinforced beam behind the exterior finish.

Before you buy anything, do this 5-minute wall check: knock on the wall (solid thud = studs behind, hollow echo = investigate further), find a window trim to identify your wall material, peek under the soffit with a flashlight for wooden framing, and ask yourself if you've ever had water issues on that wall side. Full walkthrough in our wall-mounted pergola buying guide.

3 Ways to Attach a Pergola to Your House

There are three standard attachment methods. Which one you need depends on your wall space, eave height, and what's behind your siding.

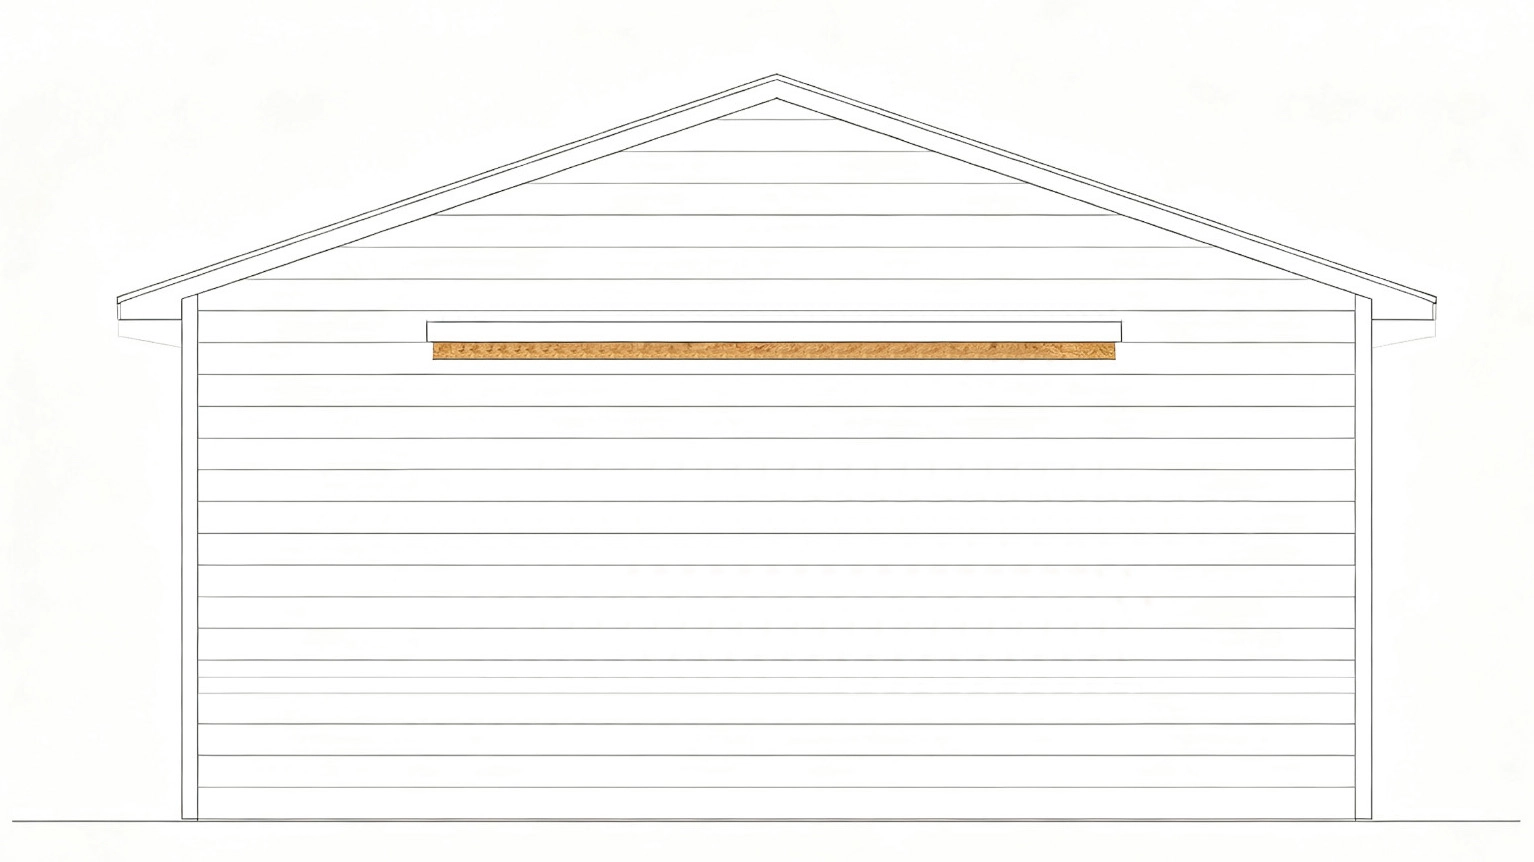
1. Ledger Board to Wall Framing

wall-mounted aluminum pergola attached directly to house wall with

This is the standard approach for 90% of installations. A horizontal beam bolts directly through your siding into the wall studs behind. The pergola's back beam rests on and fastens to this ledger.

When to use it:

  • You have at least 4 feet of clear wall space (no windows, no doors)
  • Your eave height gives enough headroom below the roofline
  • Your wall has wood stud framing

What you need: stud finder, ½" lag bolts (or through-bolts), Z-flashing, self-adhesive waterproof membrane, spacers for drainage gap.

2. Bracket Wall Mount

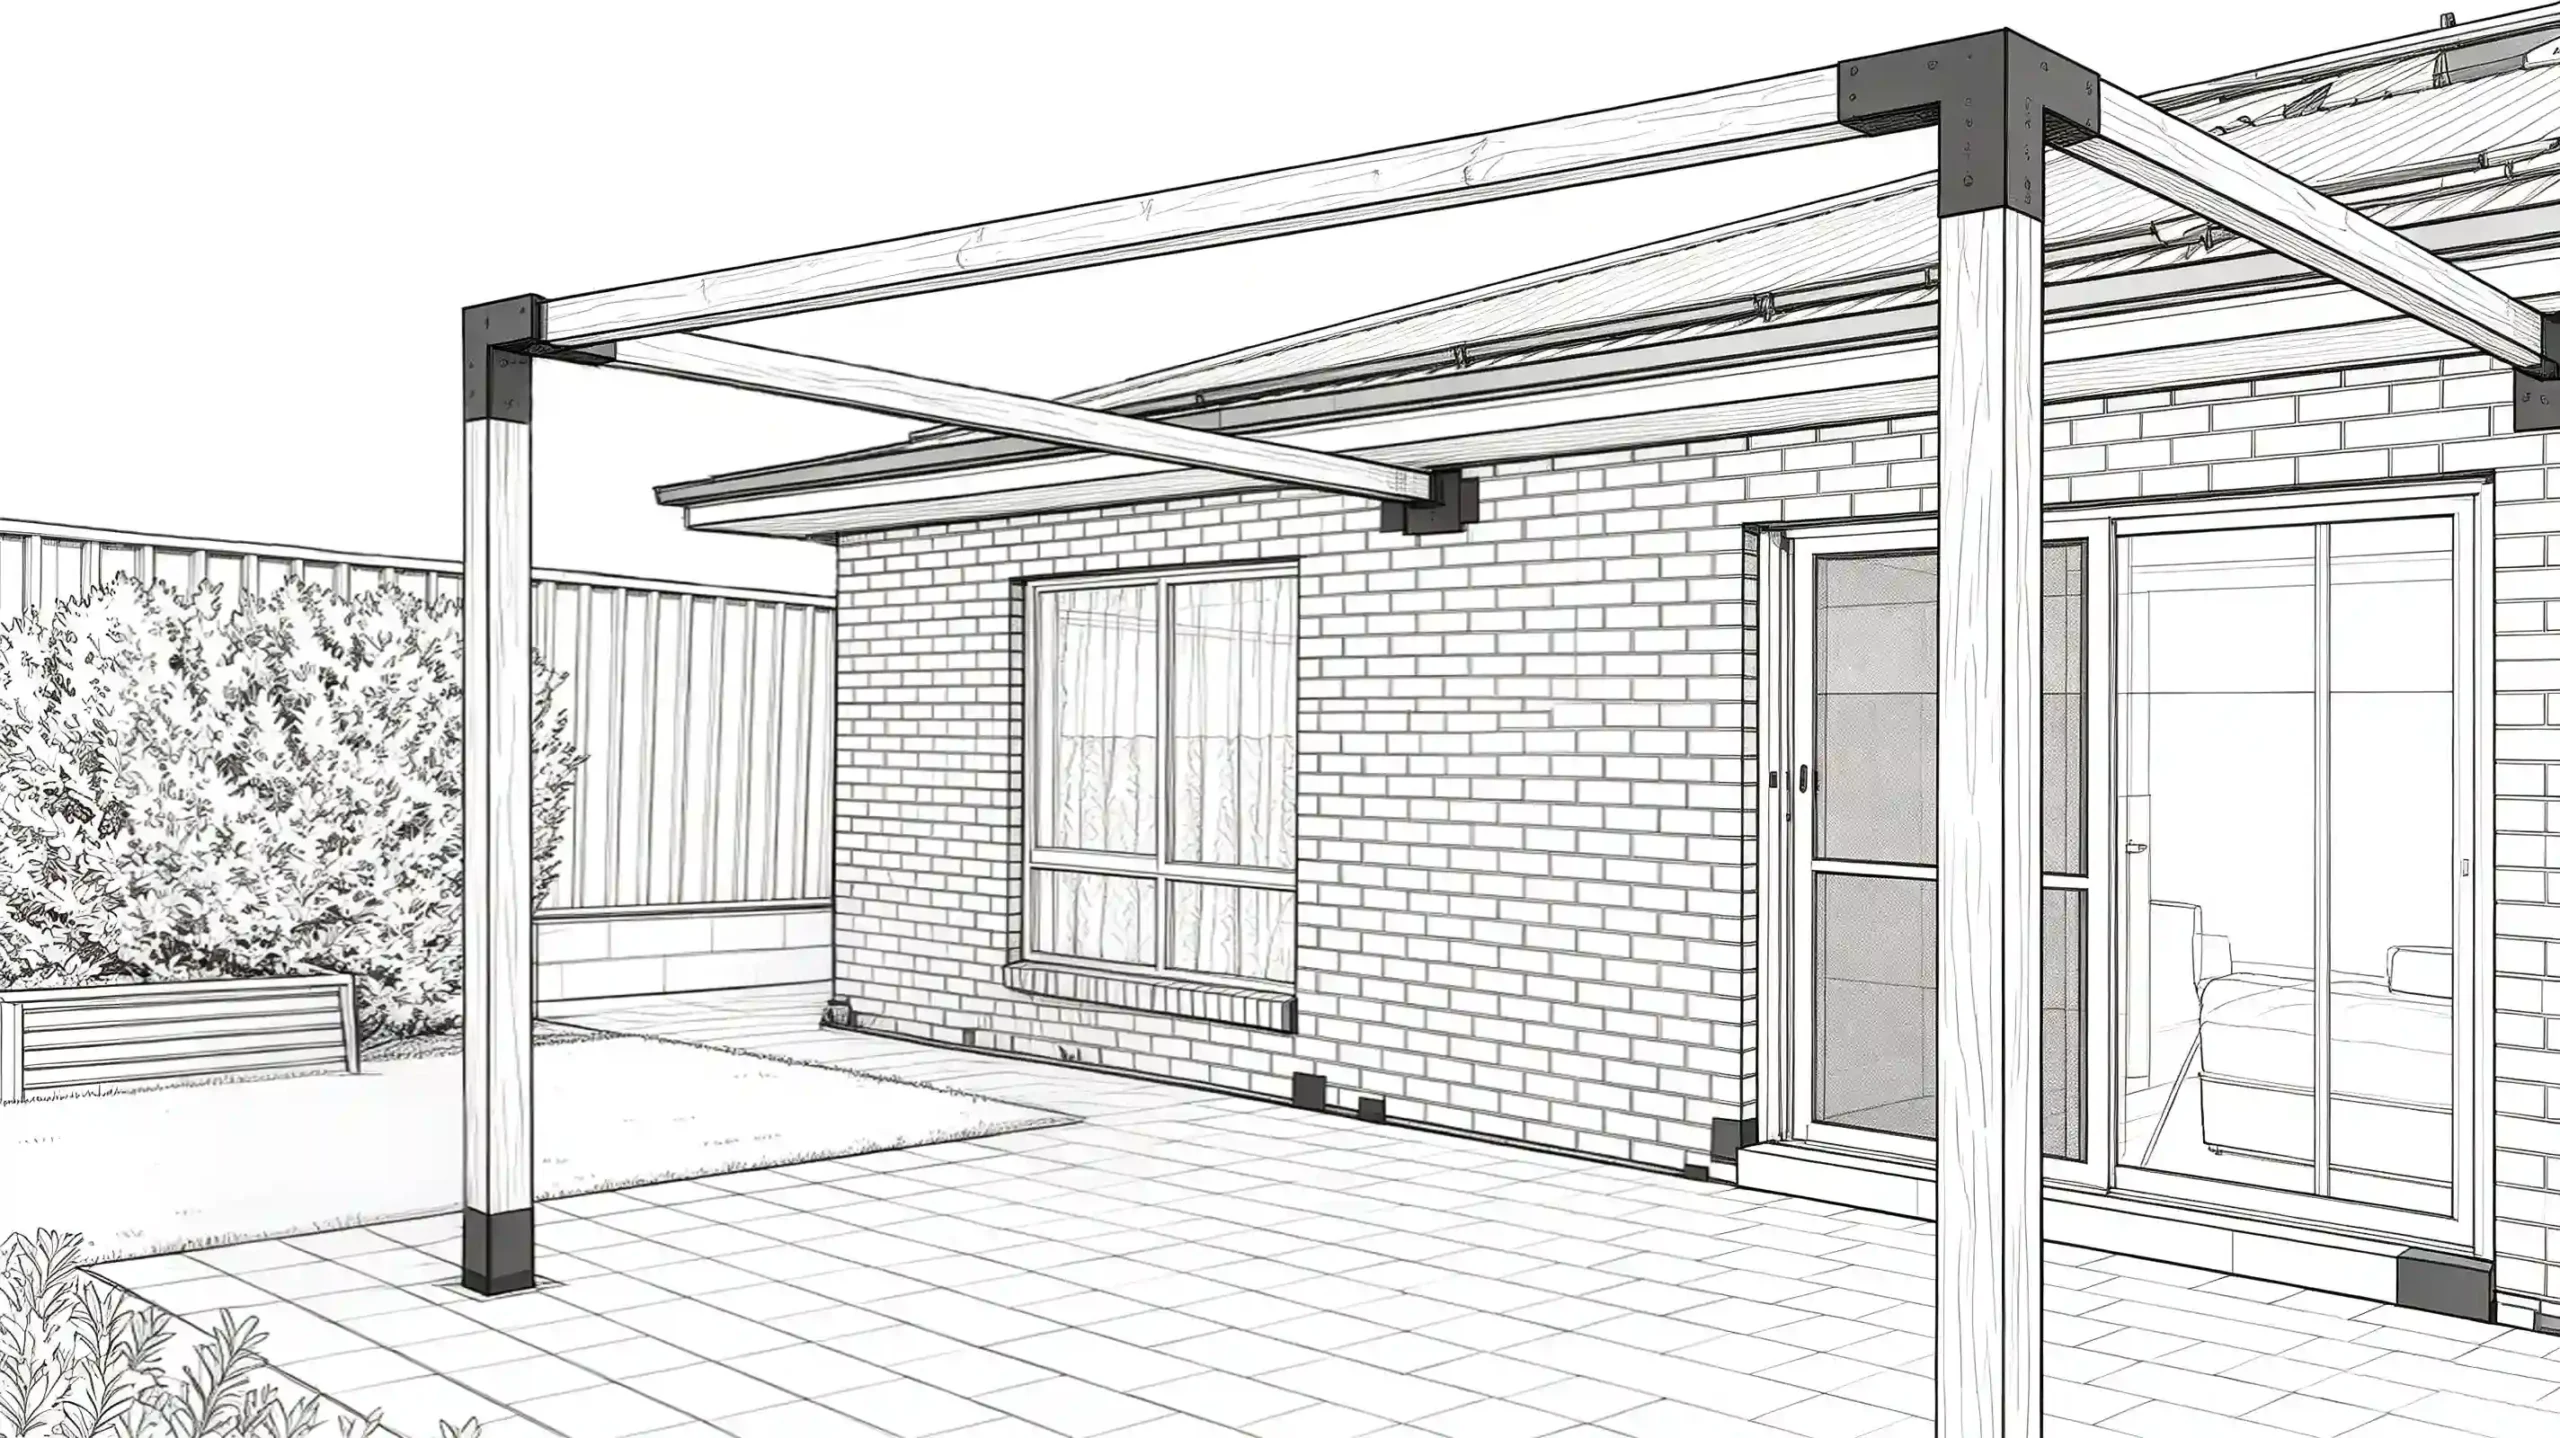
Bracket Wall Mount pergola installation sketch

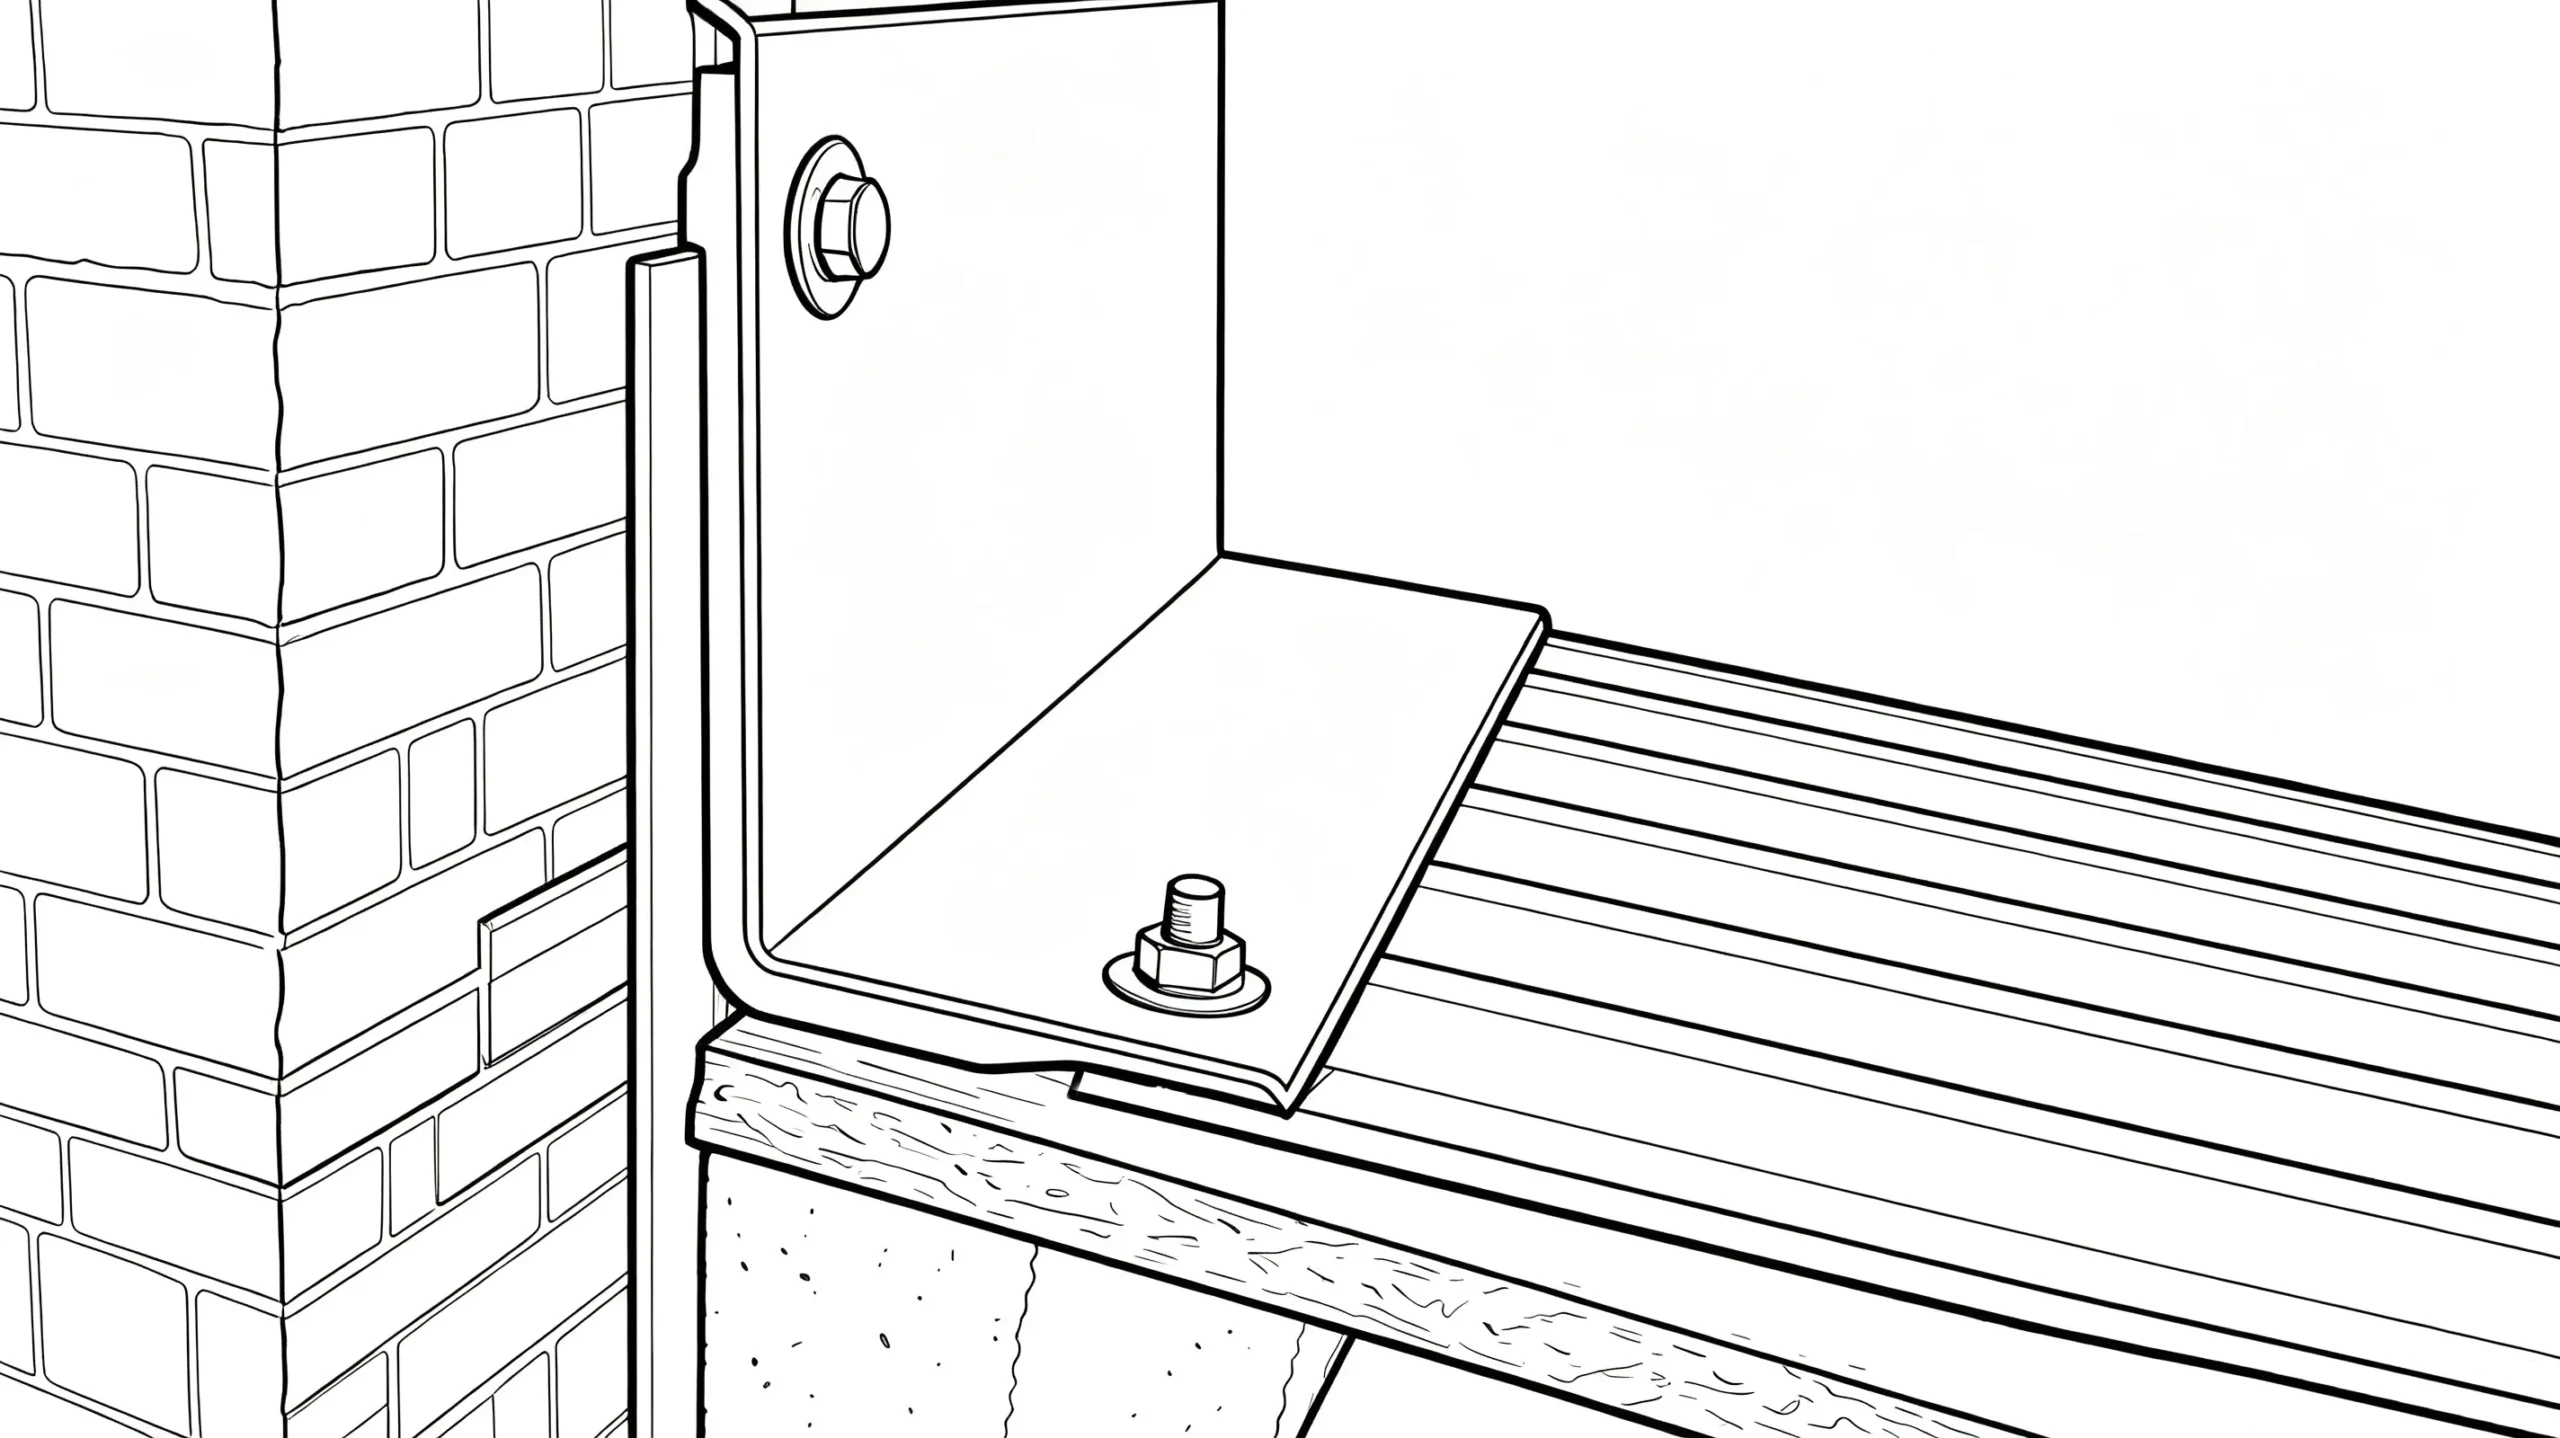
When a full ledger board isn't practical — on brick or masonry walls, or when you want a simpler attachment — heavy-duty L-shaped brackets bolt directly to the wall studs or masonry. The pergola's back beam rests on these brackets and extends outward, with two outer posts supporting the far side.

In other words, this method is simpler than a full ledger board: you don't need to cut away siding or run a continuous beam along the wall. Instead, you install individual brackets at stud locations and set the beam on top.

When to use it:

  • Your wall is brick, stone, or masonry (harder to run a full ledger)
  • You want a simpler, faster installation
  • The wall surface is uneven or textured
  • You don't need the full load-bearing capacity of a ledger board

Important note: Each bracket must bolt into wall studs or solid masonry — never just into the brick face or veneer. The brackets carry the full weight of the beam and roof, so undersized brackets or fasteners that don't reach solid backing are the #1 failure point. Use hot-dipped galvanized or stainless steel brackets rated for the load.

3. Roof Raiser Brackets

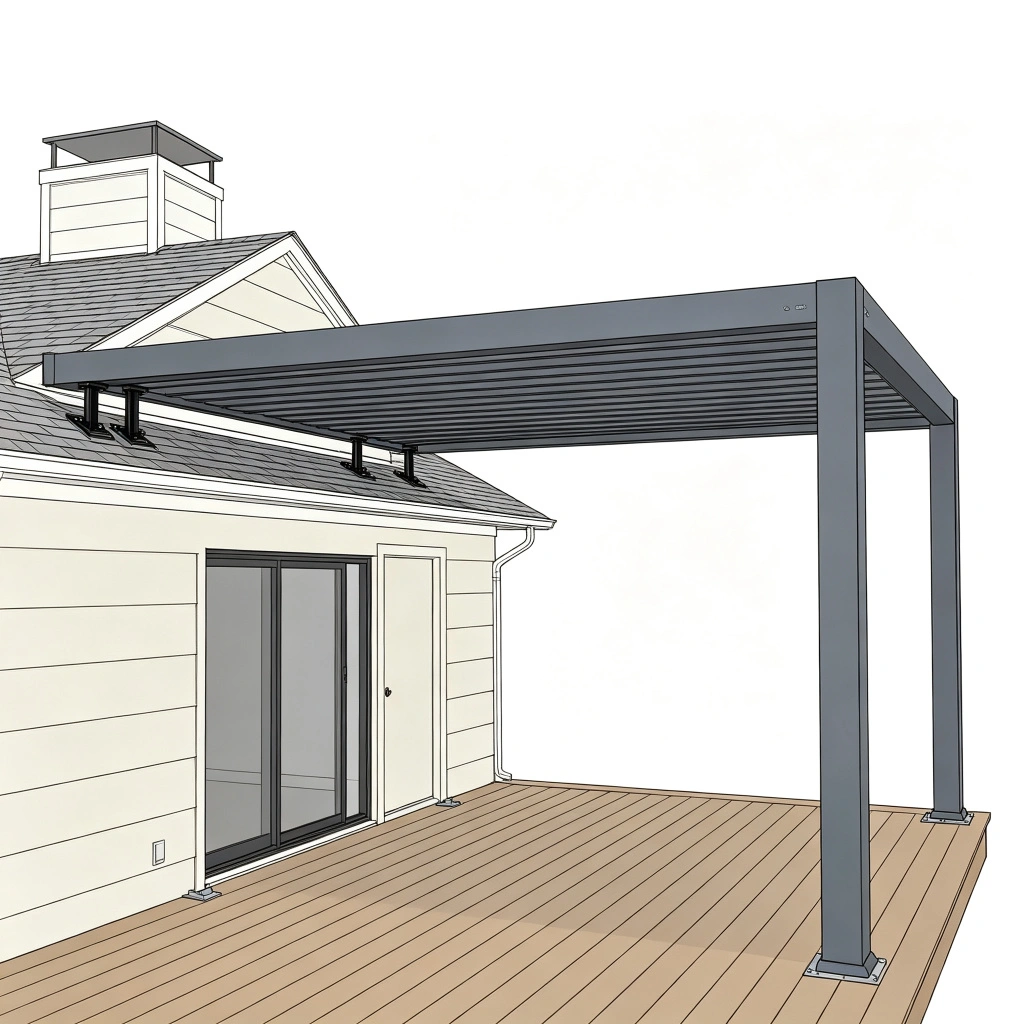
skylift roof riser brackets lifting a pergola above house roofline

For the most constrained situations — low eaves, second-floor blocking wall access — roof raiser brackets mount directly to your roof surface, lifting the pergola back beam just above the roofline. The outer posts still stand on your patio below.

When to use it:

  • Eave is too low for a comfortable walk-under height
  • A second floor blocks wall attachment entirely
  • You want the pergola to visually integrate with the roofline

Warning: This is the most complex method. Every bracket penetration through your roof is a potential water entry point. Flashing around each bracket must be flawless — this is not a DIY project.

How to choose: Start with ledger board. It's the strongest, cheapest, and easiest to waterproof. If your wall is brick or masonry and a full ledger is impractical, use bracket mount. If wall attachment of any kind won't work due to low eaves or structural constraints, go to skylift.Not sure wall-mounted is right for you? Read attached vs freestanding pergola: which is right for your backyard.

Step-by-Step: How to Install the Ledger Board

This is where most DIY projects go wrong. The ledger attachment and waterproofing is not the part to improvise. Follow these steps in order.

Step 1: Mark the Height and Find the Studs

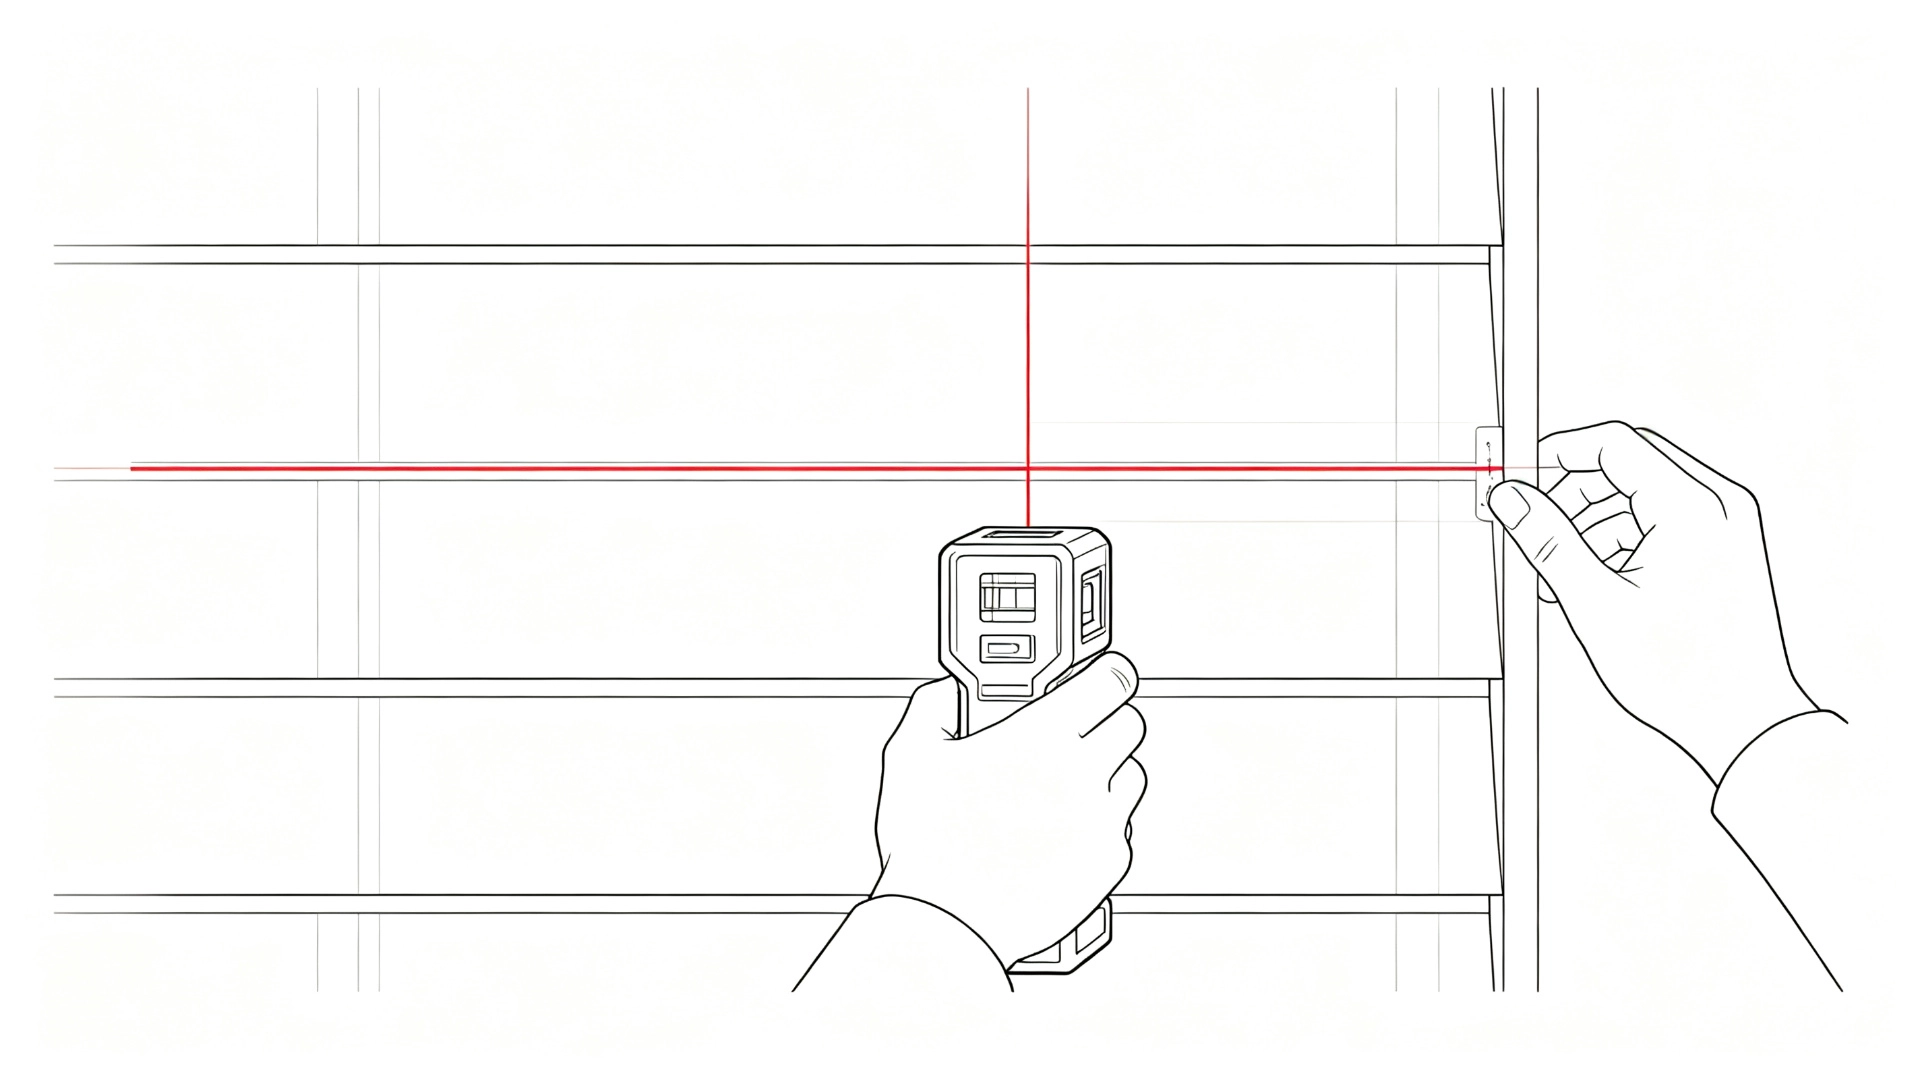
Decide your finished pergola height (typically 8–9 feet at the header). Use a laser level to draw a perfectly horizontal line across your wall at that height.

Then use a stud finder to locate every wall stud behind the siding. Mark them clearly. Standard stud spacing is 16 inches on center, but verify — older homes sometimes have 24-inch spacing.

Critical: Your lag bolts must land on studs, not between them. Bolting into sheathing or siding alone will pull out under wind load.

Step 2: Cut Away the Siding and Expose Sheathing

At the ledger height, cut away a strip of your siding (about 6–8 inches tall) to expose the OSB or plywood sheathing underneath. This lets you install the ledger flush against the sheathing — not floating on top of siding.

For vinyl siding: you'll need to remove a section and trim it later to fit around the ledger. For stucco: cut carefully with a masonry blade — stucco cracks easily.

Step 3: Apply Waterproof Membrane

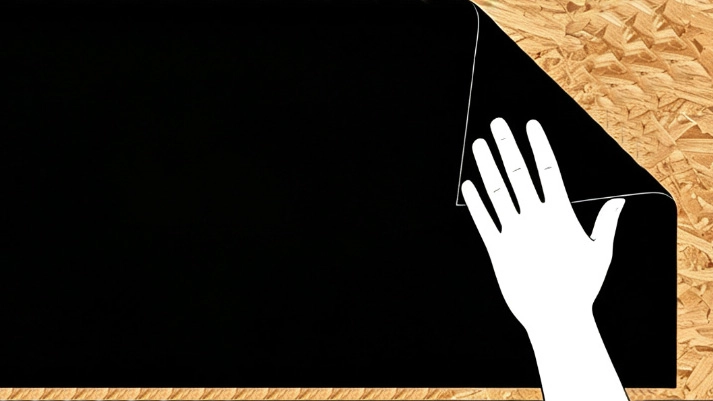
Before mounting the ledger, apply a self-adhesive waterproof membrane across the sheathing behind the entire ledger area. This is your second line of defense — even if something gets past the flashing, the membrane blocks it.

Step 4: Mount the Ledger with a Drainage Gap

Position the ledger board against the wall. Use ½" stainless steel or composite spacers between the ledger and the wall — this creates a ½" drainage gap. Any moisture that does get behind the ledger can drain downward instead of being trapped.

Drill pilot holes through the ledger, spacers, and sheathing into the studs. Drive ½" lag bolts (or through-bolts with nuts on the interior side) through the ledger. Use two bolts per stud for maximum pull-out resistance.

Step 5: Install Z-Flashing

This is the step that prevents water damage. Cut metal Z-flashing (galvanized steel or aluminum) to the width of your ledger. Tuck the upper lip under the siding course above. The Z-shape creates a shingle-like overlap: water runs down the siding, passes over the flashing lip, and goes over the ledger — never behind it.

Extend the flashing at least 1 inch past each end of the ledger to prevent water from seeping around the sides.

Step 6: Caulk — Top and Sides Only, Not the Bottom

Run a bead of exterior-grade silicone caulk along the top edge of the ledger where it meets the wall, and along both sides.

Do NOT caulk the bottom. The bottom must stay open so the drainage gap can do its job. Sealing the bottom traps moisture — which is exactly what causes rot.

If you skip all the details, remember these three rules:

  1. Bolts go into studs, never just siding
  2. Z-flashing goes above the ledger, tucked under the siding above
  3. Bottom of the ledger stays open for drainage

Note: The steps above describe a traditional wood pergola installation. If you're going with a pre-engineered aluminum kit like Sola, the ledger brackets are factory-engineered and the flashing details come with the kit — you don't need to buy Z-flashing, waterproof membrane, and spacers separately from the hardware store. The wall connection still needs professional installation, but the material sourcing and fabrication are already done for you.

Setting the Outer Posts and Concrete Footings

The ledger handles the house side. Now you need support on the outer edge — two posts on concrete footings.

How Deep Should the Footings Be?

Footings must extend below your local frost line — no exceptions. If you pour above the frost line, the ground freezes and pushes the footing up in winter, and drops it back in spring. Over a few years, this shifts and cracks the structure.

Frost depth varies dramatically:

RegionTypical Frost DepthExample Cities
Frost-free (South)0"Miami, Houston, Phoenix, Southern CA
Deep South / Gulf Coast6"–12"Atlanta, New Orleans, Birmingham
Upper South12"–18"Charlotte, Oklahoma City, Dallas
Mid-South / Border South24"–30"Nashville, Virginia Beach, Baltimore
Midwest / Mid-Atlantic32"–42"Chicago, Columbus, Philadelphia, Indianapolis
Upper Midwest / Northeast42"–48"Boston, Des Moines, Pittsburgh
Northern Tier48"–60"Milwaukee, Minneapolis, Madison, Burlington
Far North60"+Fargo, Minneapolis, Anchorage, Bangor

Frost depth ranges shown are typical values per IRC Table R301.2(1). Always confirm your local frost depth with the county building department before pouring footings.

What Size Sonotube?

  • 6x6 wood posts (most common): 12-inch diameter minimum, 14–16-inch recommended
  • Aluminum posts (like Sola): 12–18 inch diameter, depending on the pergola span

Use cardboard sonotubes (the disposable concrete forms) to create clean, round footing piers. Add 4–6 inches of compacted gravel at the bottom of each hole for drainage.

Post Base Anchors

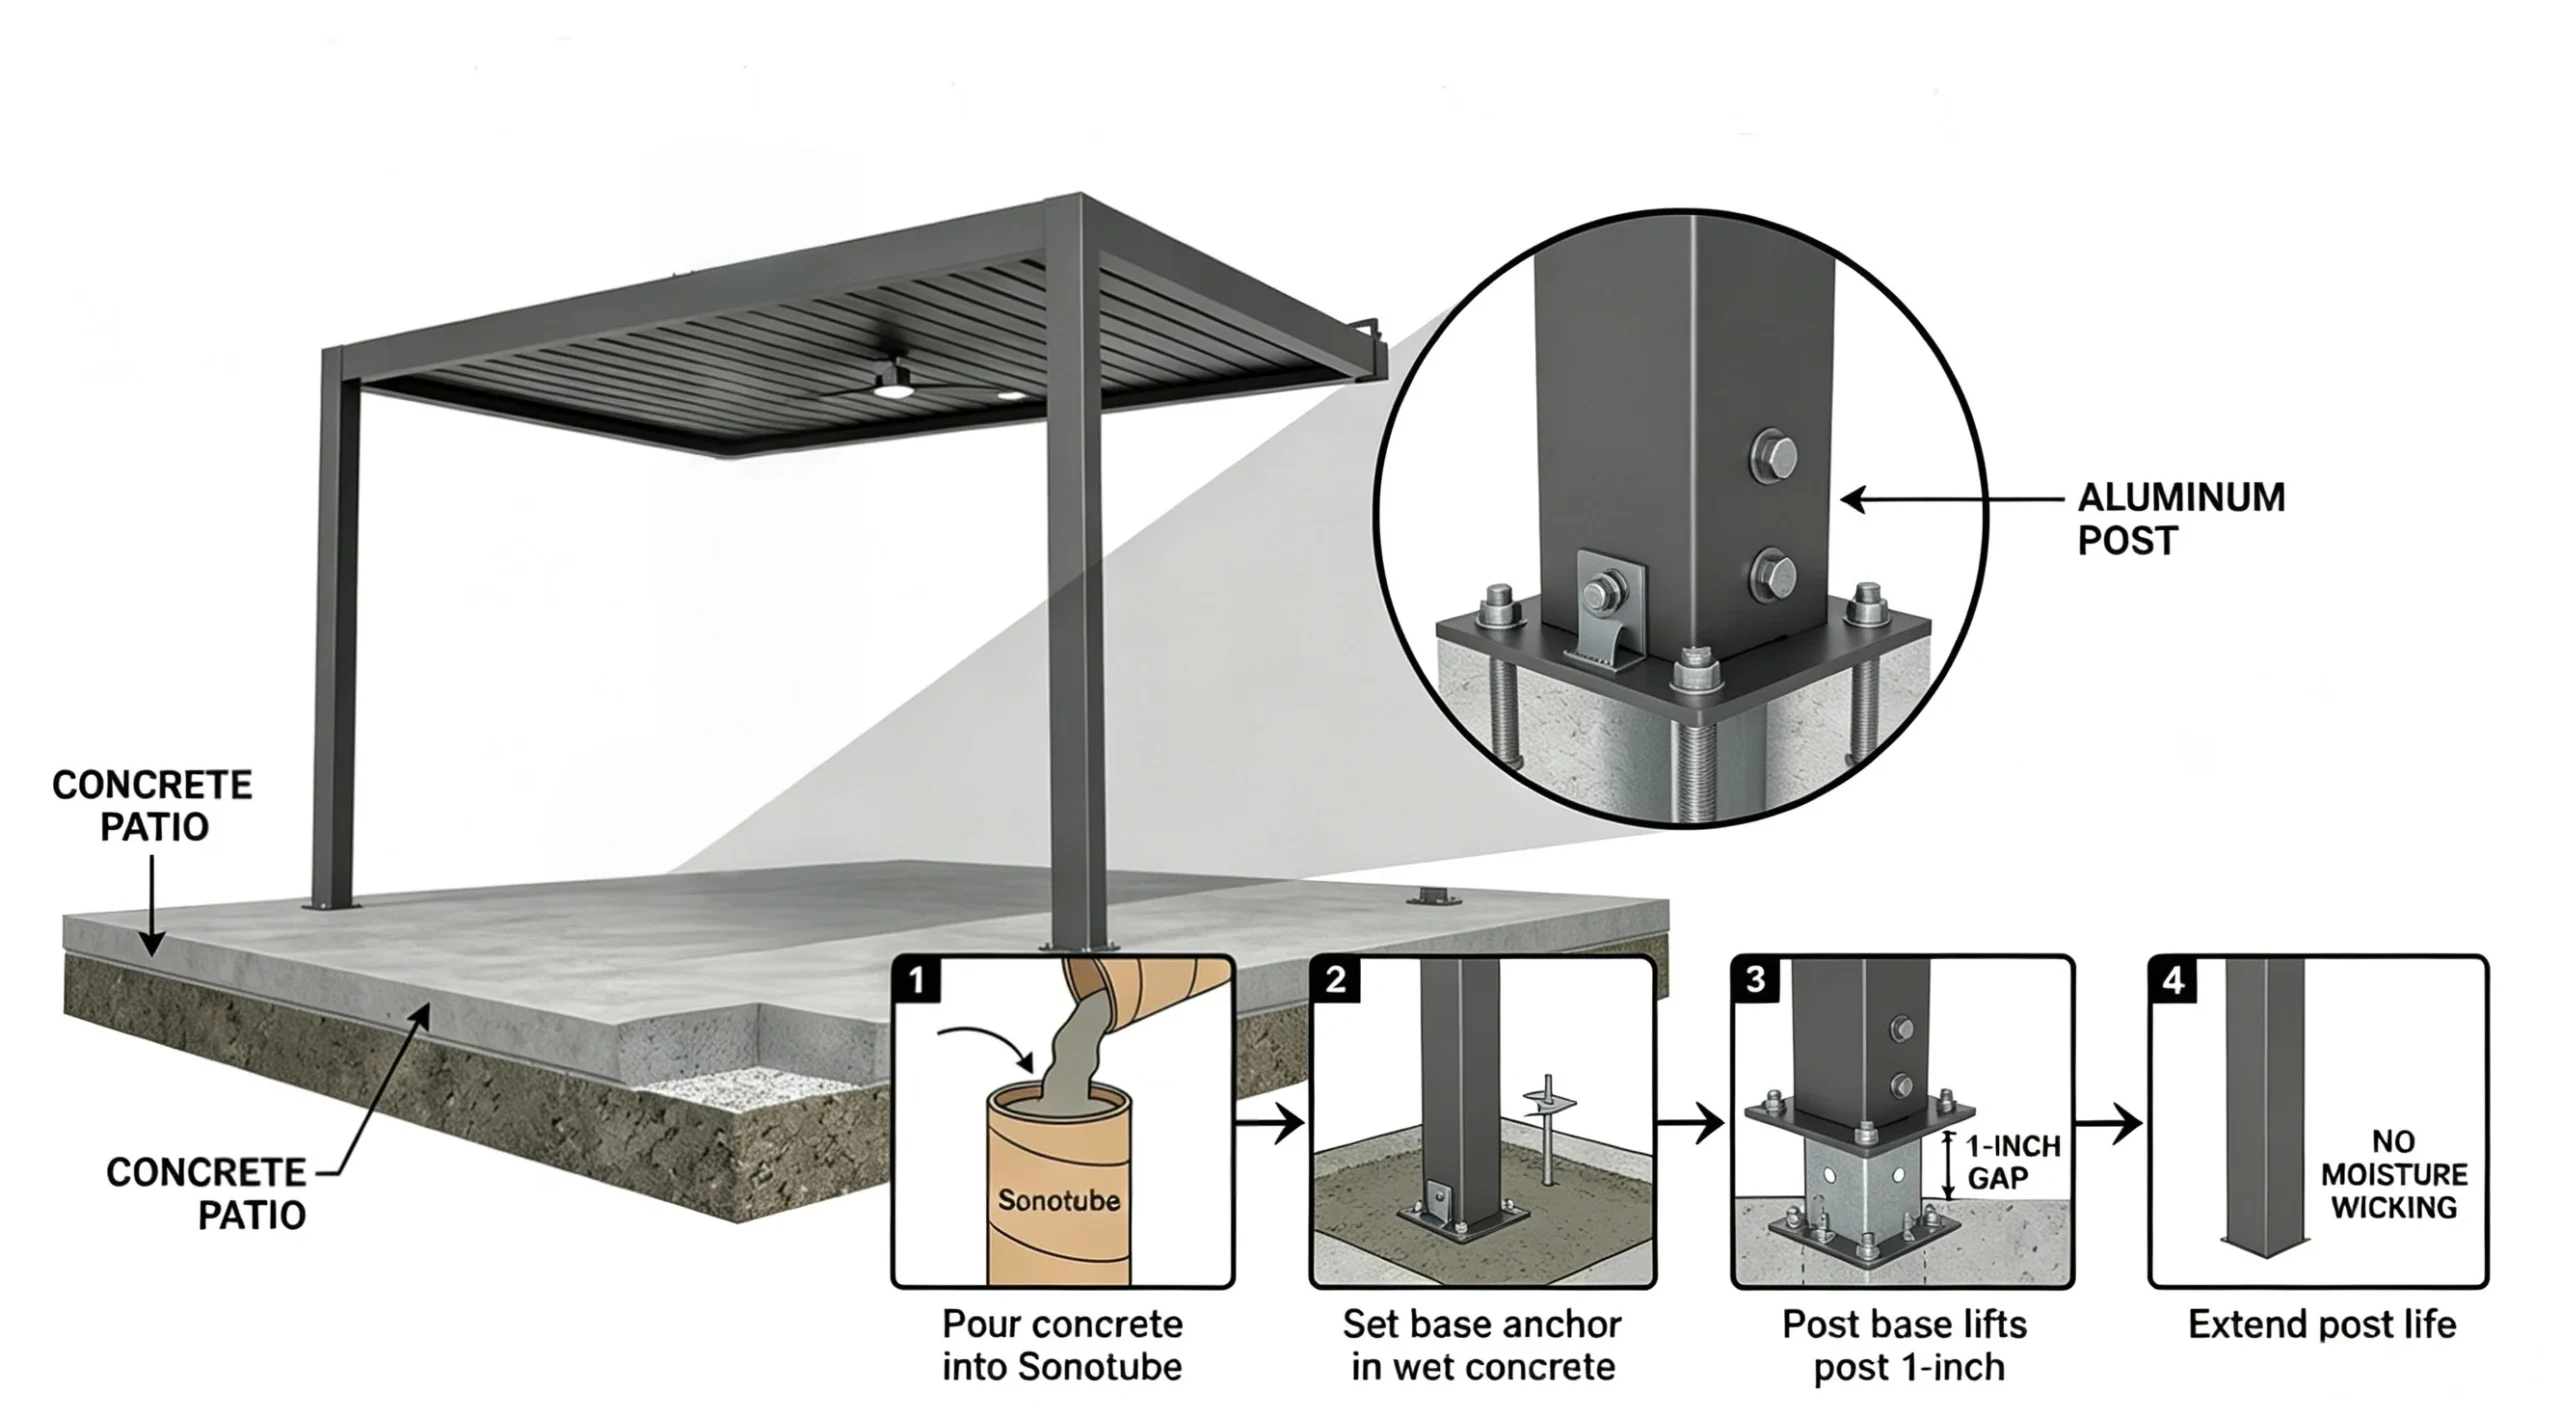
Don't set a wood post directly on wet concrete — concrete wicks moisture up and the post rots from the bottom. Instead:

  1. Pour concrete into the sonotube
  2. While still wet, set a galvanized steel post base anchor into the concrete
  3. Once cured, bolt the post to the anchor

As a result, the post base lifts the post 1 inch above the concrete surface — preventing moisture wicking and extending the post life by decades.

Note: Pre-engineered aluminum kits like Sola include the post base anchors in the box — you don't need to source them separately.

Call 811 Before You Dig

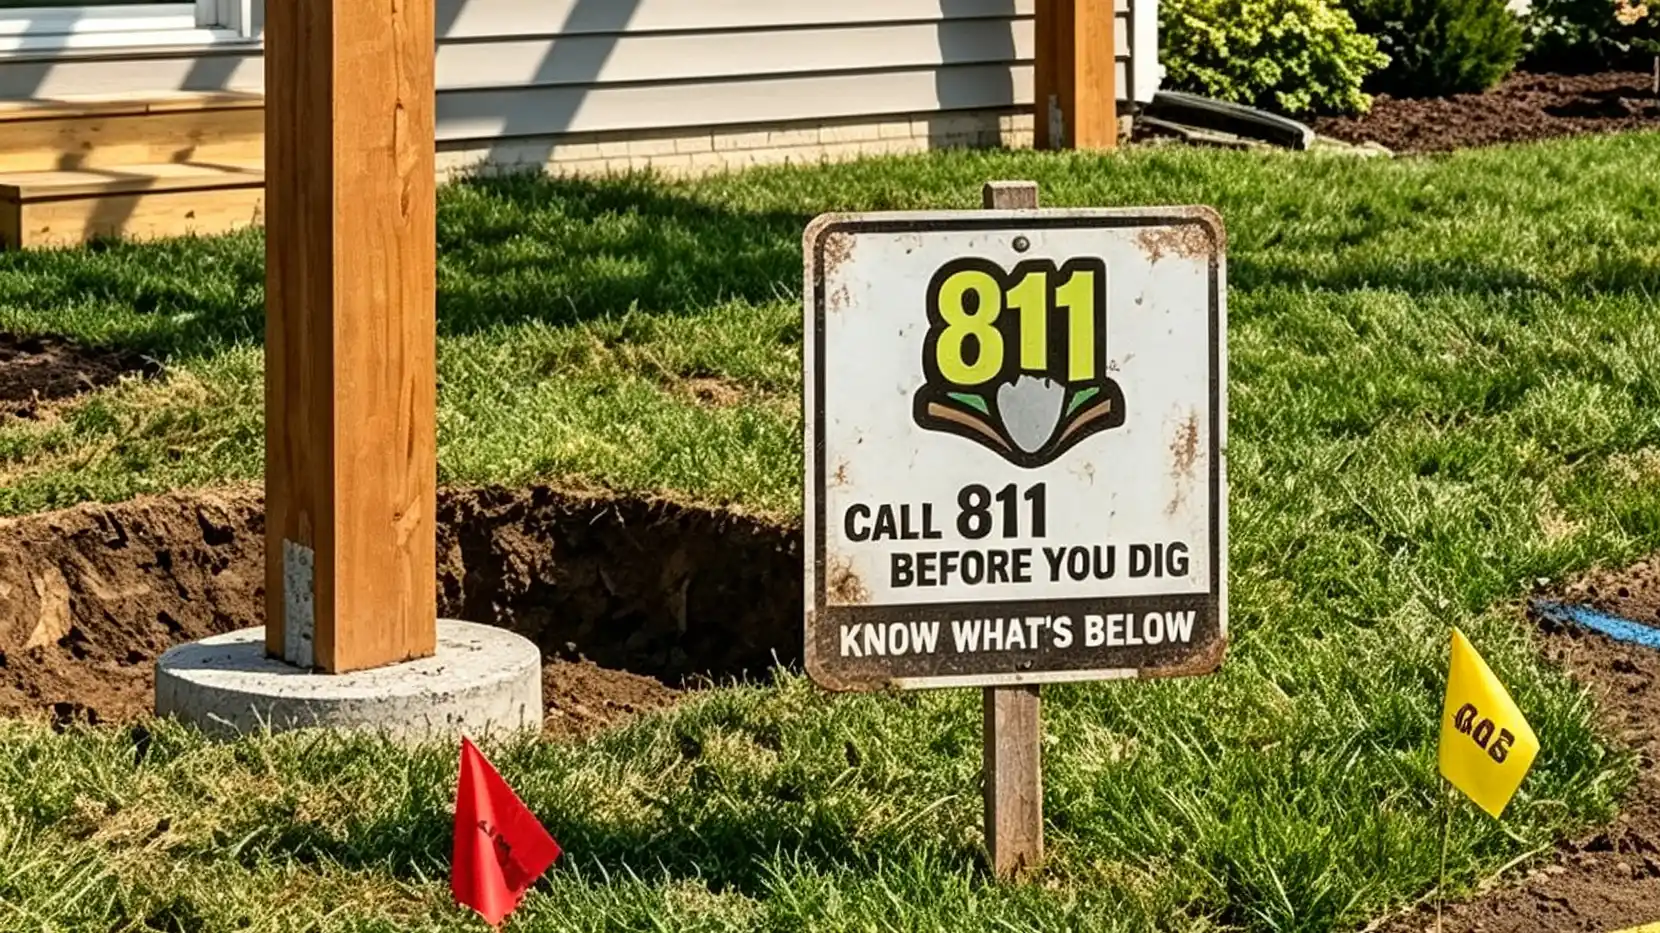
At least 2 full business days before digging, call 811 or submit online. This free national service sends utility companies to mark buried gas, electric, water, and fiber lines. Hitting a gas line isn't just expensive — it's dangerous.

Aluminum Solar Pergola vs Wood Pergola

If you're choosing between a wood DIY kit and a pre-engineered aluminum solar louvered pergola, the installation experience is completely different.

Wood DIY Pergola

With a wood pergola kit or raw lumber, here's what you're actually signing up for:

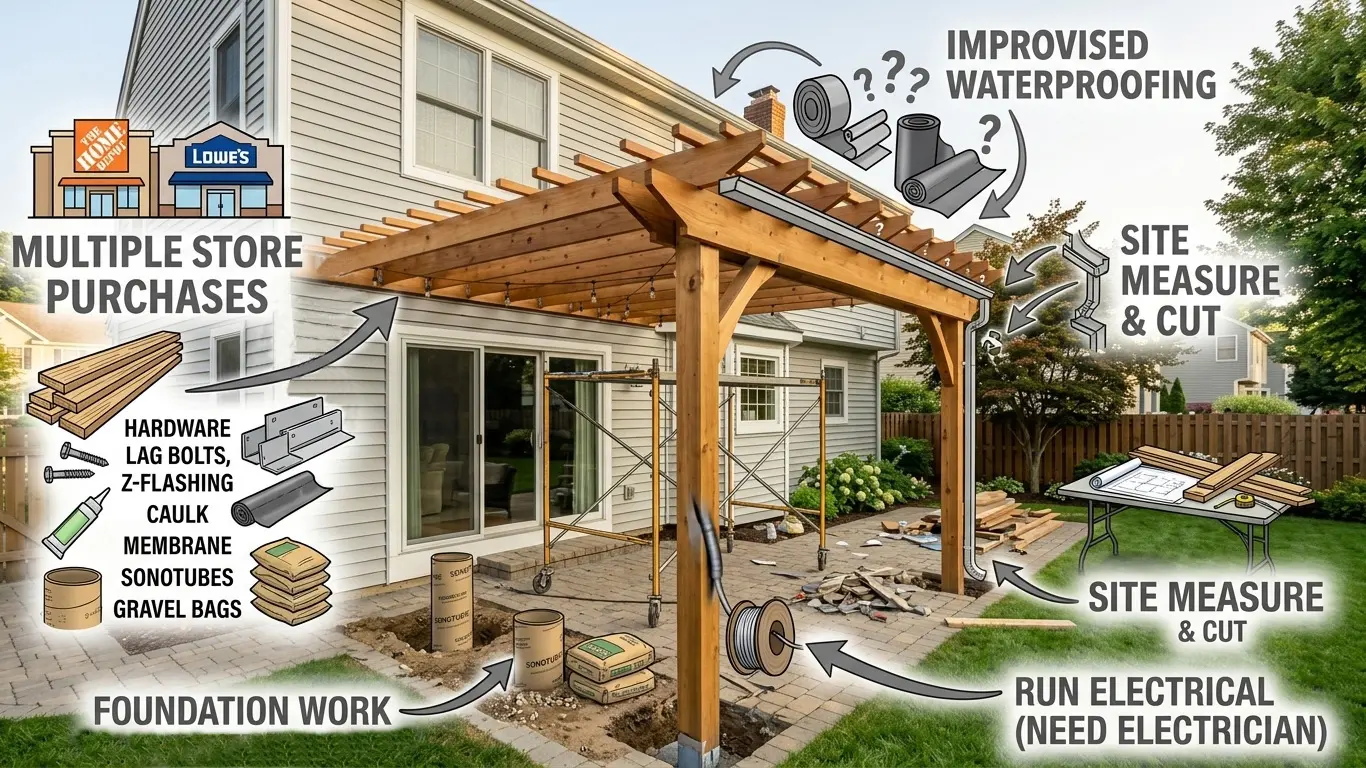
  • Buy materials from multiple stores: Pressure-treated lumber for the frame, lag bolts, Z-flashing, self-adhesive waterproof membrane, spacers, caulk, sonotubes, gravel, concrete mix — all purchased separately
  • Cut everything on-site: Rafters, beams, purlins, ledger board — measured, cut, and drilled by hand
  • Improvise the waterproofing: Buy the right materials, figure out how to install them correctly, hope you didn't miss a step
  • Plan your own drainage: Decide where gutters go, how to slope the roof, where downspouts land
  • Run electrical (if you want lights/fans): Hire an electrician to run conduit from your house
  • Expect 2–3 weekends of work with basic carpentry skills

Pre-Engineered Aluminum Solar Louvered Pergola

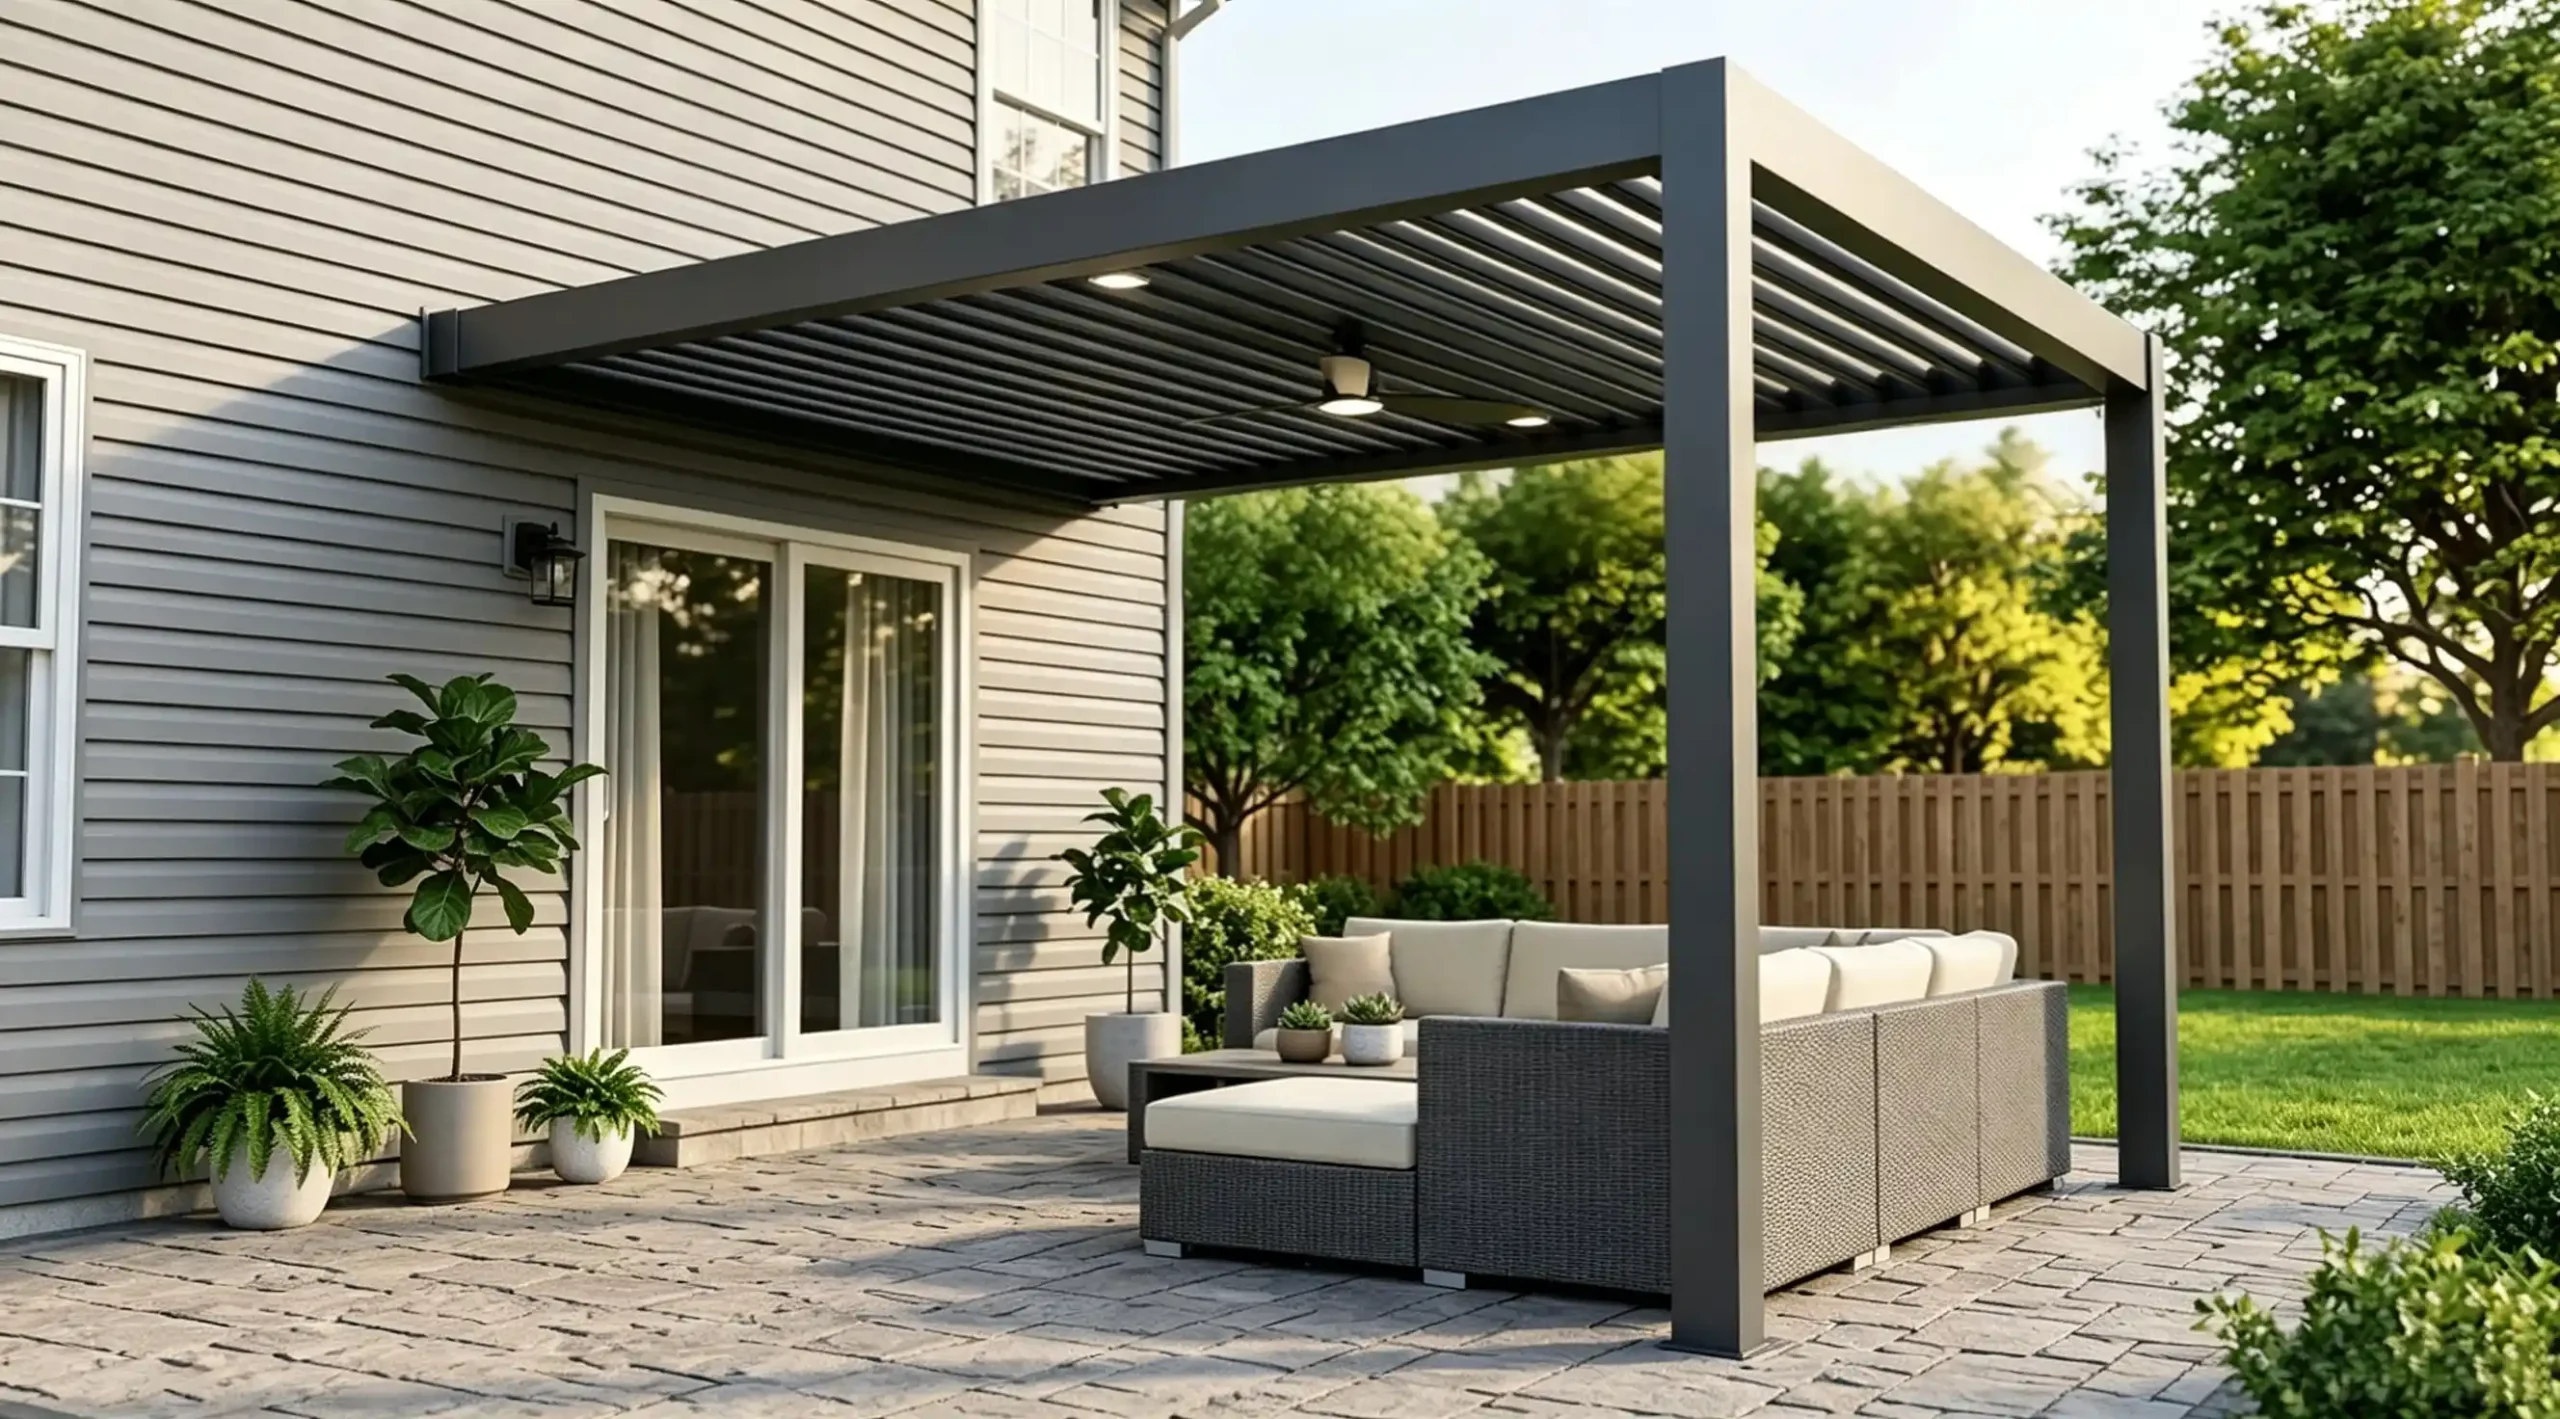
With a pre-engineered system like Sola, most of the work happens in the factory — not your backyard:

  • One complete kit arrives: All frame sections, brackets, fasteners, flashing details, and post base anchors come in one shipment. No separate trips to the hardware store for lumber or supplies.
  • Pre-cut and pre-drilled: Every beam, post, and louver is cut to exact size at the factory. No on-site measuring, no circular saw, no drill press.
  • 3–5 hours assembly: A 3-person team assembles the modular frame in a single afternoon — not multiple weekends. The wall connection and flashing are handled by professionals; the rest is bolt-together assembly.
  • Hidden drainage built-in: You don't need to plan gutters, slope the roof, or install downspouts. Rainwater flows along the louver blade grooves into an internal waterway, down through the hollow posts, and drains out at the bottom. Completely hidden — no external gutters to plan or maintain.
  • No electrical work: Integrated solar panels power the motor, LED lights, and optional ceiling fans. No electrician, no conduit, no trenching.
  • No future maintenance: Powder-coated aluminum doesn't rot, warp, or need staining. Wood pergolas need staining every 2–3 years.

Wondering which material lasts longer? See wood vs aluminum wall-mounted pergola: which lasts longer.

DIY vs Pre-Engineered Kit Comparison

FactorDIY Wood BuildPre-Engineered Aluminum Kit
Materials sourcing6–8 separate purchasesOne shipment, everything included
Installation time2–3 weekends3–5 hours with 3-person crew
Structural engineeringYou design and sign offAlready engineered
DrainageDIY gutters or noneIntegrated in-frame system
MaintenanceStain every 2–3 yearsNone
Lifespan10–15 years with maintenance20+ years
Upfront costLowerHigher
Long-term valueMediumHigh
Permitting complexityYou handle itManufacturer provides specs

FAQs About Attaching a Pergola to Your House

How do you attach a pergola to a house without damaging the wall?

Bolt the ledger board into wall studs (not just siding), install Z-flashing above the ledger tucked under the siding course above, and caulk only the top and sides — never the bottom. Proper installation creates a weatherproof seal without damaging the wall.

Can you attach a pergola to vinyl siding?

Yes, but you must remove the vinyl siding in the ledger area first. Bolting directly through vinyl into sheathing alone will pull out. After installation, reinstall the siding trimmed to fit around the ledger, with flashing between the ledger and the wall.

What size lag bolts do I need for a pergola ledger?

Use ½" diameter lag bolts (or through-bolts), penetrating at least 2–3 inches into the wall studs. Space them every 16 inches, with two bolts per stud for maximum pull-out resistance. Use stainless steel or hot-dipped galvanized to prevent corrosion.

How far from the house can a pergola extend?

Most residential wall-mounted pergolas extend 8–16 feet from the wall. Beyond 16 feet, you'll likely need a third intermediate post or heavier beam sizing. The exact span depends on your pergola's engineering and local wind/snow loads.

Do I need a permit to attach a pergola to my house?

In most US municipalities, yes. Attached pergolas are classified as structural additions, not freestanding accessory structures. The permit application typically requires a site plan, ledger connection details, and footing specifications. Always check with your local building department before starting.

Can I attach a pergola to a brick house?

Yes. For brick or masonry walls, a bracket wall mount is typically the simplest approach — heavy-duty L-shaped brackets bolt directly into the masonry or wall studs behind the brick, and the pergola beam rests on top. Standard lag bolts won't hold in brick alone — use epoxy anchors or structural sleeve anchors drilled into mortar joints. For heavier pergola loads, consult a structural engineer. If you have brick veneer over wood framing, you can also run a full ledger board through the brick into the studs behind.

Which attachment method should I choose — ledger board, bracket mount, or skylift?

Start with a ledger board if you have clear wall space and wood stud framing — it's the strongest and most common. If your wall is brick, stone, or masonry, use bracket wall mount. If wall attachment of any kind won't work due to low eaves, second-floor obstruction, or roofline design, use skylift roof riser brackets. When in doubt, have a contractor assess your specific wall before ordering.

How long does it take to attach a pergola to a house?

A professional crew installs most wall-mounted pergolas in 1–2 days. DIY wood builds take 2–3 weekends, depending on experience. A pre-engineered aluminum kit like Sola assembles in 3–5 hours with a 3-person team — the wall connection is handled by professionals, and the rest is bolt-together modular assembly.

What happens if the ledger isn't flashed properly?

Water seeps behind the ledger, into the wall cavity, and against your home's framing. This causes rot, mold, and structural damage that's invisible until you notice water stains on your interior walls. Repair costs typically run $3,000–$10,000+ — far more than the cost of doing the flashing right the first time.

Do pre-engineered aluminum pergola kits come with everything needed?

Yes — unlike wood DIY projects where you buy lumber, fasteners, flashing, and concrete forms separately from a hardware store, a pre-engineered aluminum kit ships with all frame sections, brackets, fasteners, flashing details, and post base anchors in one shipment. The only things you source locally are concrete and gravel for the footings. No on-site cutting, no separate shopping trips.

Conclusion

Attaching a pergola to your house is a straightforward project when you follow the right sequence — but the details matter. The ledger board must bolt into structural framing, the flashing must create a shingle-like overlap above the ledger, and the bottom must stay open for drainage. The outer posts need concrete footings below the frost line with post base anchors to prevent rot.

If you'd rather skip the carpentry weekends and the hardware store runs, a pre-engineered aluminum solar louvered system like Sola simplifies the whole process: the frame arrives pre-cut and pre-drilled, the hidden drainage system is built-in, the solar-powered motor and lights need no wiring, and a 3-person team assembles it in 3–5 hours. The result is a maintenance-free outdoor space with adjustable shade, rain protection, and no trips to the lumber aisle.

Browse our wall-mounted pergola case studies to see real installations, or request a free quote to get sizing and installation guidance for your specific home.

Back to top of page
crossmenu